Remove background from image files without uploading a single photo
Most tools that promise to remove background from a photo are websites. You upload, you wait, you download, and you do it again for the next image — and somewhere along the way your photographs have been copied onto a server you do not control. Turbo Bulk Background Remover inverts that. The model, the matting solver, the compositing and the encoder all live on your machine. The application reads straight from your disk and writes straight back to it, which is why a folder of two thousand product shots is a coffee break rather than an afternoon.
The AI background remover at the centre of it is isnet-general-use, the same general-purpose segmentation network that powers rembg, run at 1024×1024 through ONNX Runtime. It is genuinely general-purpose: people, products, food, furniture, vehicles, pets, artwork and packaging all work without picking a mode. When a compatible GPU is present the model runs on it through DirectML or CUDA, typically five to fifteen times faster than on CPU, and when one is not, it falls back to CPU automatically and still works.
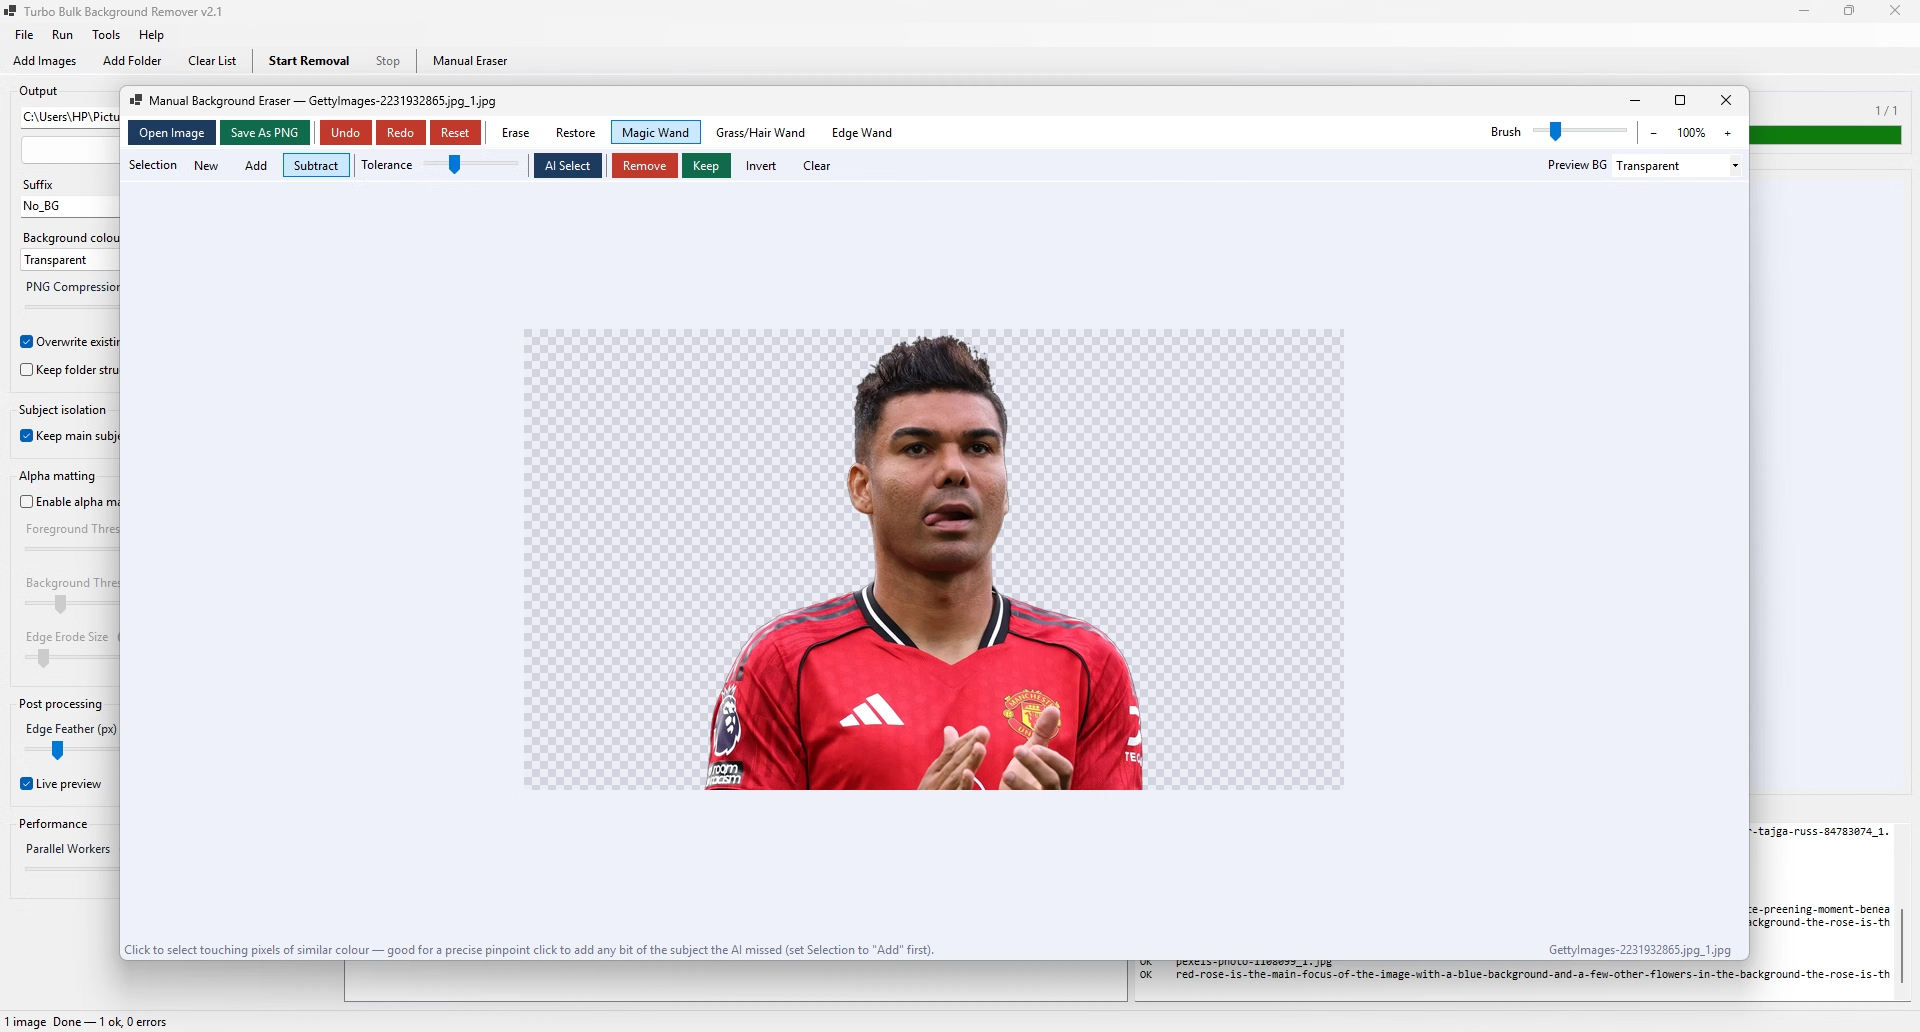
Automatic removal gets most photos to finished in one pass. For the rest, the built-in manual background eraser opens any single image on a checkerboard canvas with an erase and restore brush, three different wand tools and a one-click AI selection, so you can fix a chewed edge or rescue a reflective subject by hand instead of re-shooting it. The two halves share one loaded model, so switching between them costs nothing.
▶ Bulk AI Background Removal
Queue individual files, or point the app at a folder and let it walk every sub-folder for supported images. The queue holds file paths rather than decoded pictures, so tens of thousands of entries cost almost nothing in memory. Start it, walk away, come back to a folder of finished transparent PNGs.
▶ Local isnet-general-use Neural Network
A real segmentation model — roughly 170 MB, run at 1024×1024 — loaded once and shared by every worker for the whole session. It is a general-purpose model, so the same settings handle a portrait, a sneaker on a white sweep and a plate of food without switching modes.
▶ Automatic GPU Acceleration
DirectML covers essentially any modern Windows GPU — AMD, Intel or NVIDIA — and CUDA is used on NVIDIA cards where available. The provider is detected at startup and the app falls back to CPU silently if none is usable. Help ▸ About tells you which one is actually live.
▶ Manual Background Eraser
A full second workspace for one image at a time: erase and restore brushes from 5 to 150 px, Magic Wand, Grass/Hair Wand, Edge Wand, one-click AI Select, and a pending-selection workflow with New, Add and Subtract modes.
Alpha Matting for Hair and Fur
A closed-form matting solver refines the boundary between subject and background, recovering partial transparency so hair, fur, fine fabric and glass survive the cut. Three controls drive it: Foreground Threshold (1–255), Background Threshold (5–50) and Edge Erode Size (0–20 px).
Keep Main Subject Only
Discards small disconnected patches of background that survived the mask, leaving just the main connected subject. On by default, and the reason most product cut-outs come out clean with no manual work at all. Turn it off when a photo genuinely has several separate subjects.
Edge Feather
A 0 to 10 pixel blur applied to the cut-out edge so the subject blends into whatever you composite it onto rather than showing a hard, aliased boundary. One pixel is the default and suits most work; zero keeps the mask perfectly crisp.
Six Output Backgrounds
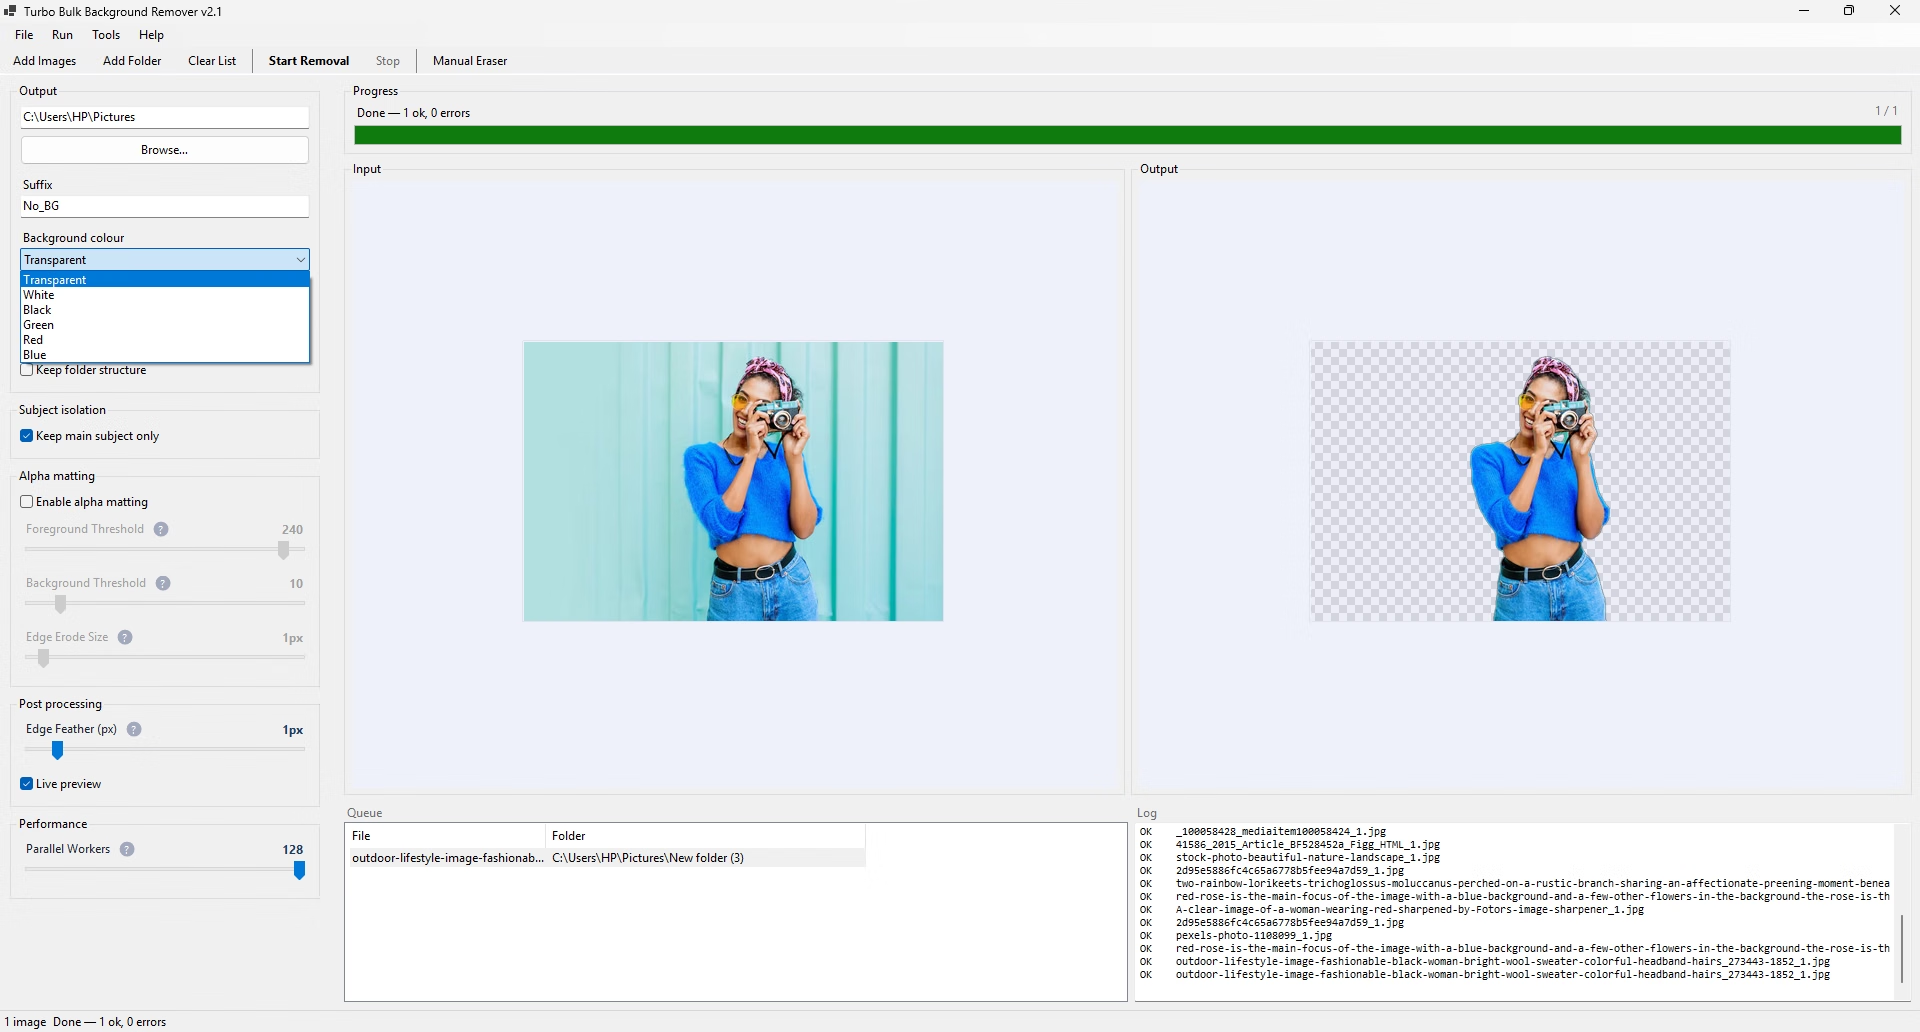
Keep a real alpha channel with Transparent, or have White, Black, Green, Red or Blue composited in behind every subject as it saves. The green is a standard chroma-key green, so cut-outs can go straight into video editing software.
PNG Compression Control
A 0 to 9 slider trading save speed against file size. Zero writes fastest and largest; nine writes smallest and slowest. Six is the default and a sensible middle. Every output is PNG, because it is the only widely supported format that carries real transparency.
Suffix and Folder Structure
Every output gets a filename suffix — No_BG by default, so photo.jpg becomes photoNo_BG.png. Tick Keep folder structure and the sub-folder layout of your source is recreated inside the output folder instead of everything landing flat.
Overwrite Protection
Leave Overwrite existing files off and anything already present in the output folder is skipped rather than replaced — and each skip is named in the log rather than quietly counted as a success, so a resumed batch tells you exactly what it did.
Up to 128 Parallel Workers
Reading, decoding, feathering and saving all overlap across as many as 128 worker threads, hiding disk work behind model inference. An in-flight memory governor caps total decoded pixels at about a third of available RAM (bounded to 512 MB–4 GB), so a high setting is safe rather than a gamble.
Live Before / After Preview
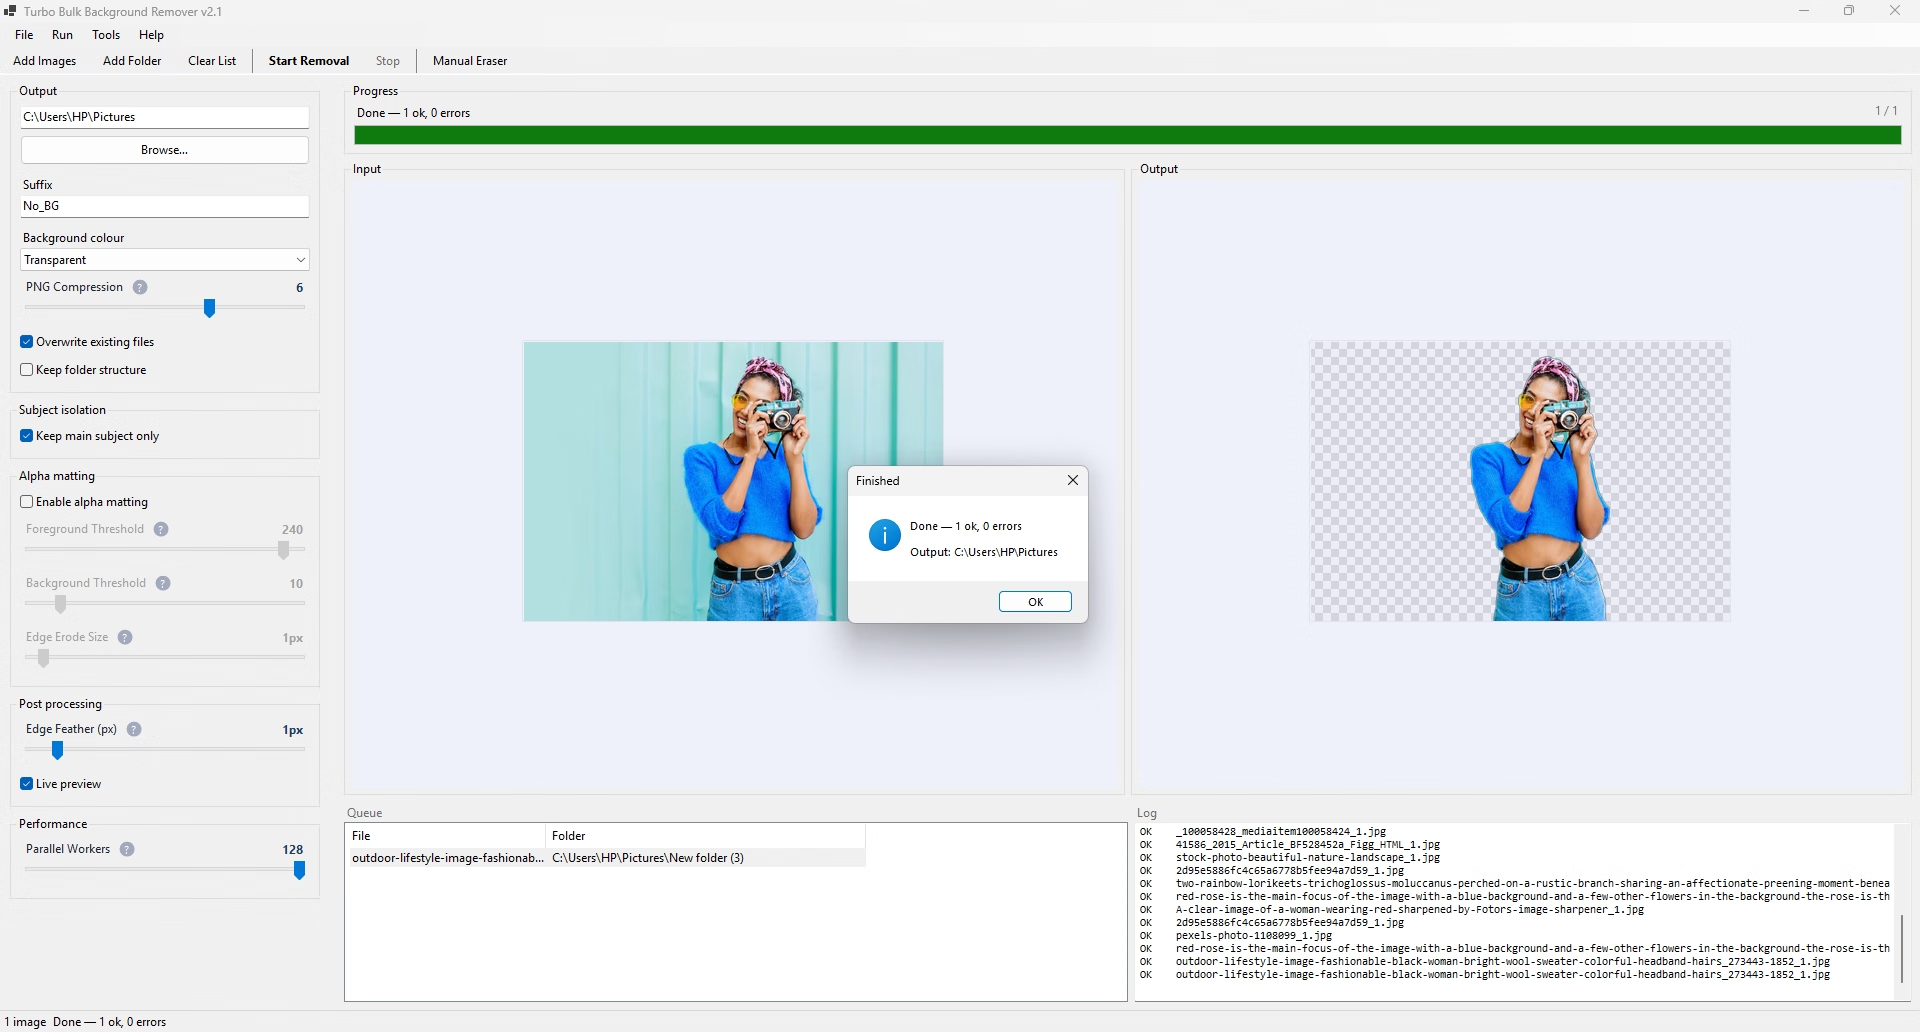
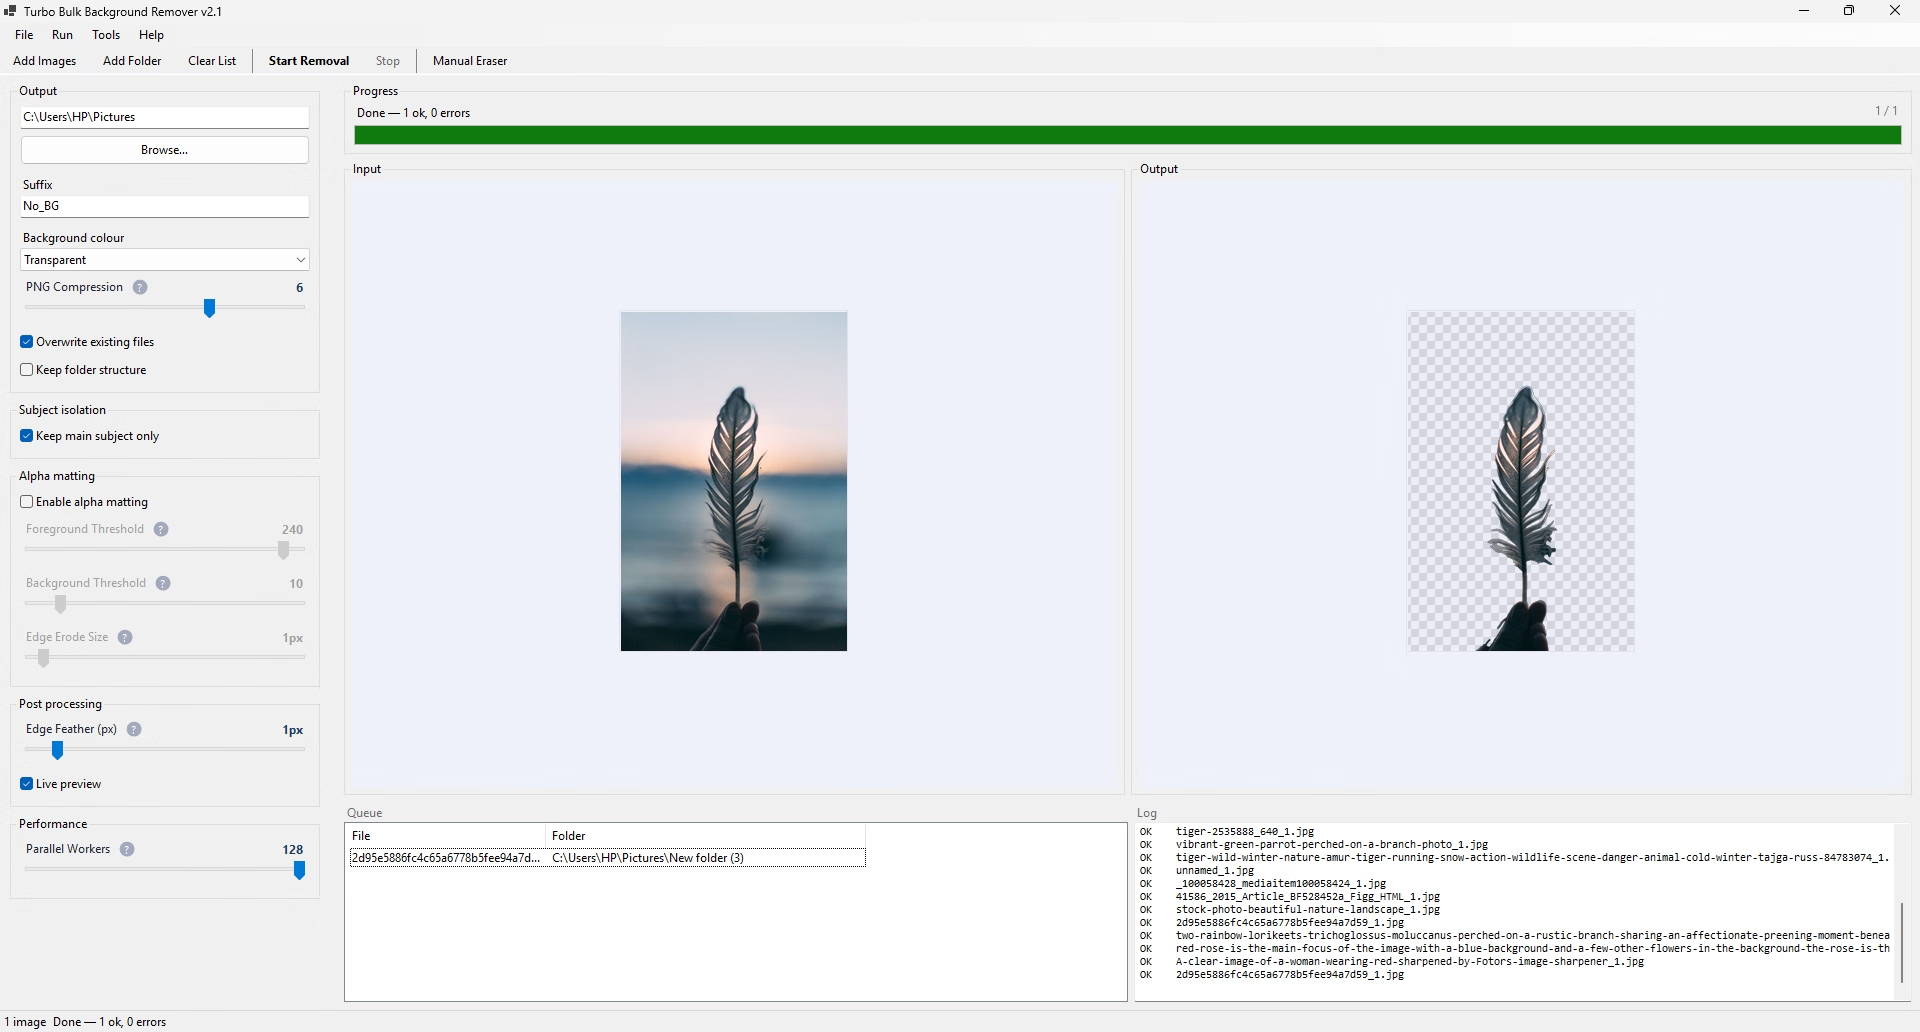
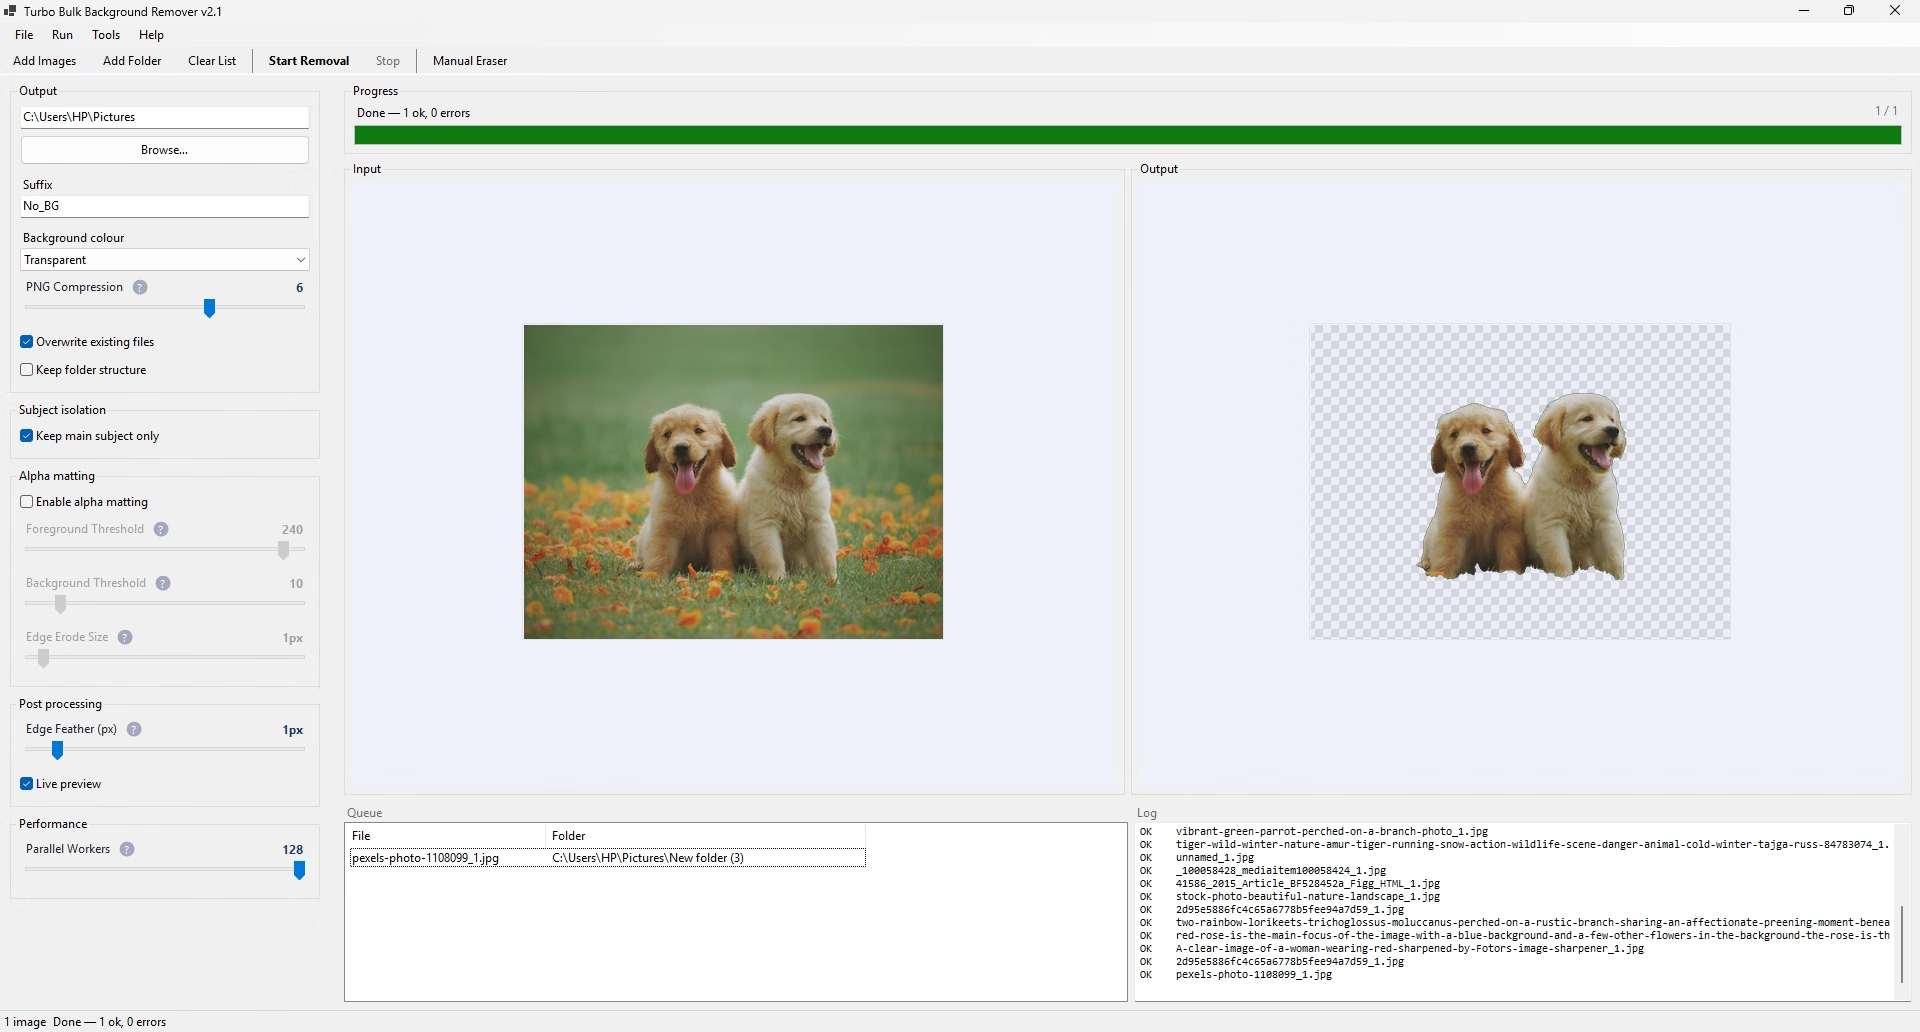
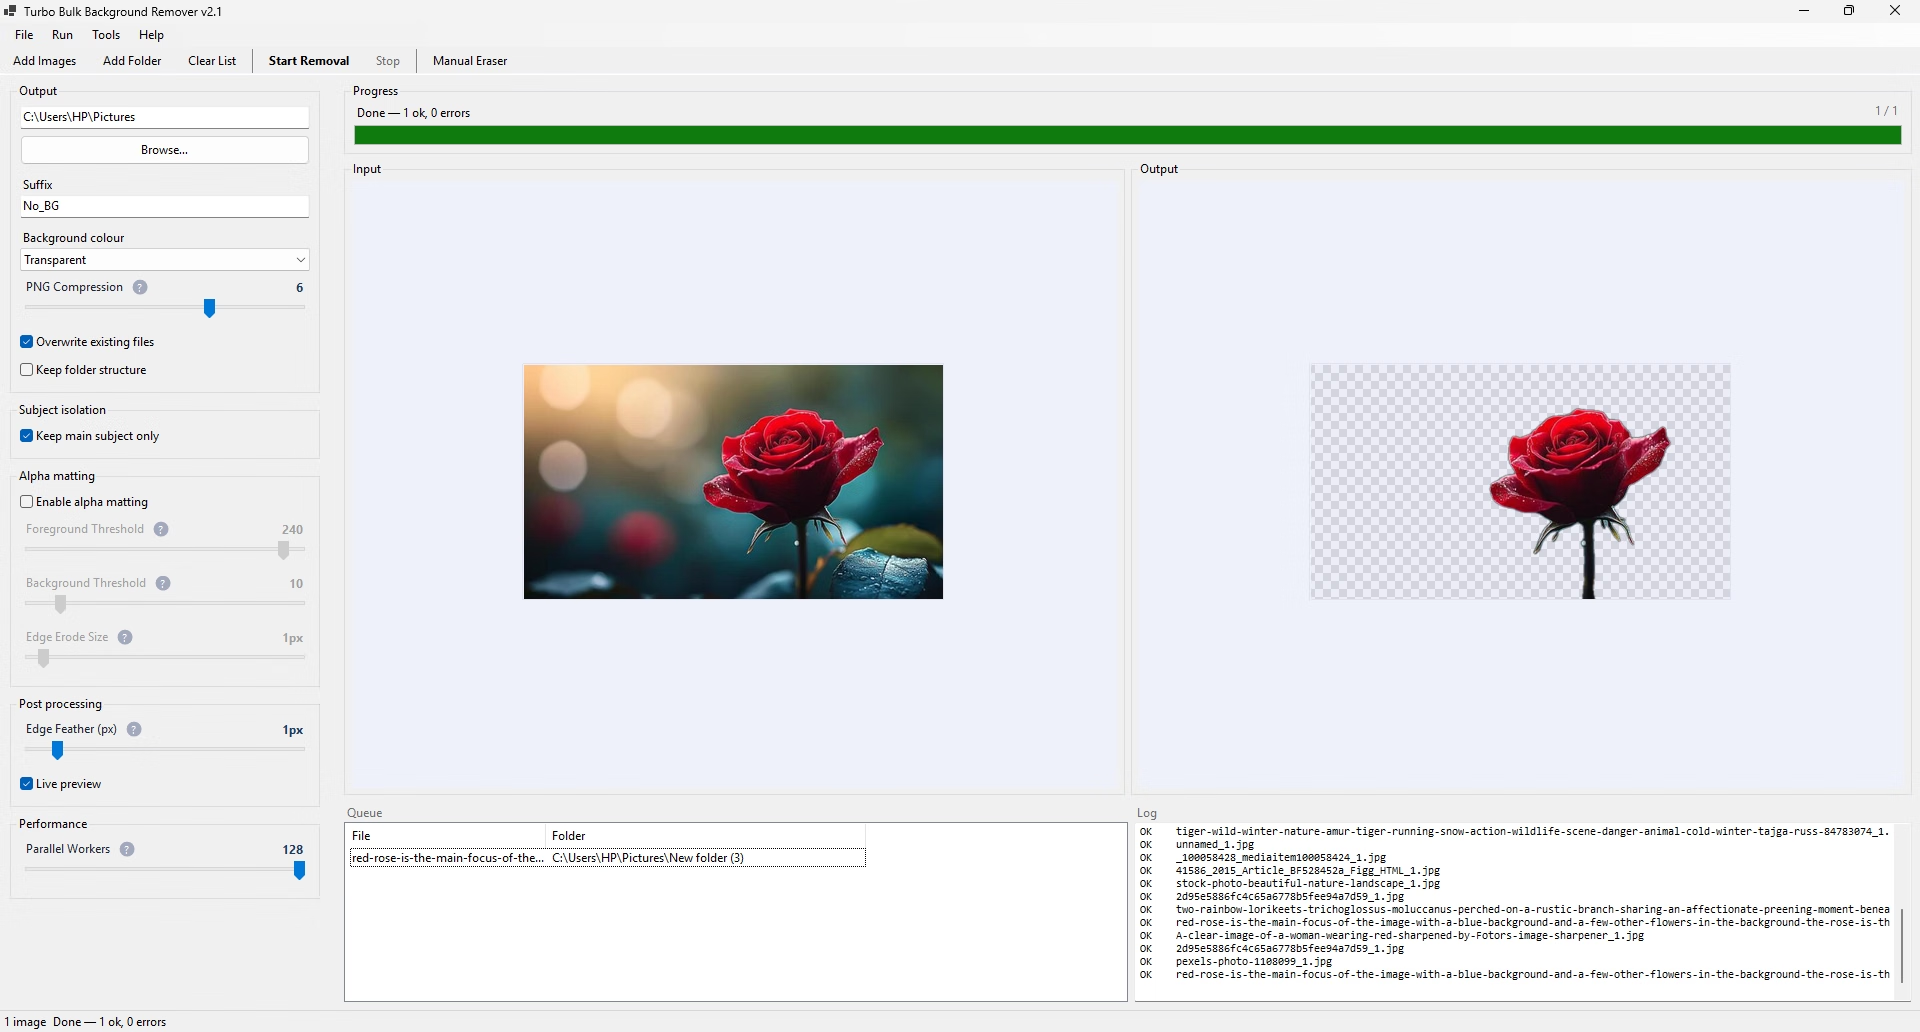
Input and output preview cards update as the batch runs, drawn over a checkerboard so transparency is unmistakable. Switch the preview off for the fastest possible unattended runs on very large queues.
Progress, Log and Tally
A full-width progress bar, the name of the file being worked on, a live done/total percentage, and a running ok/errors count in the status bar. Underneath, a monospace log capped at 1,000 lines records every skip, fallback and failure with its reason.
Drag and Drop Anywhere
Drop files or folders onto the queue, onto the Add buttons, or anywhere on the window and they join the batch. Drop a folder onto the output box and it becomes your destination. The queue itself is sortable, with a right-click menu for removing selections and opening containing folders.
Wide Input Format Support
Opens PNG, JPG, JPEG, WEBP, BMP, TIFF and TIF, and mixed-format folders are no problem — queue JPEGs, WebP files and TIFFs together and they all come out as transparent PNGs.
Full Keyboard Control
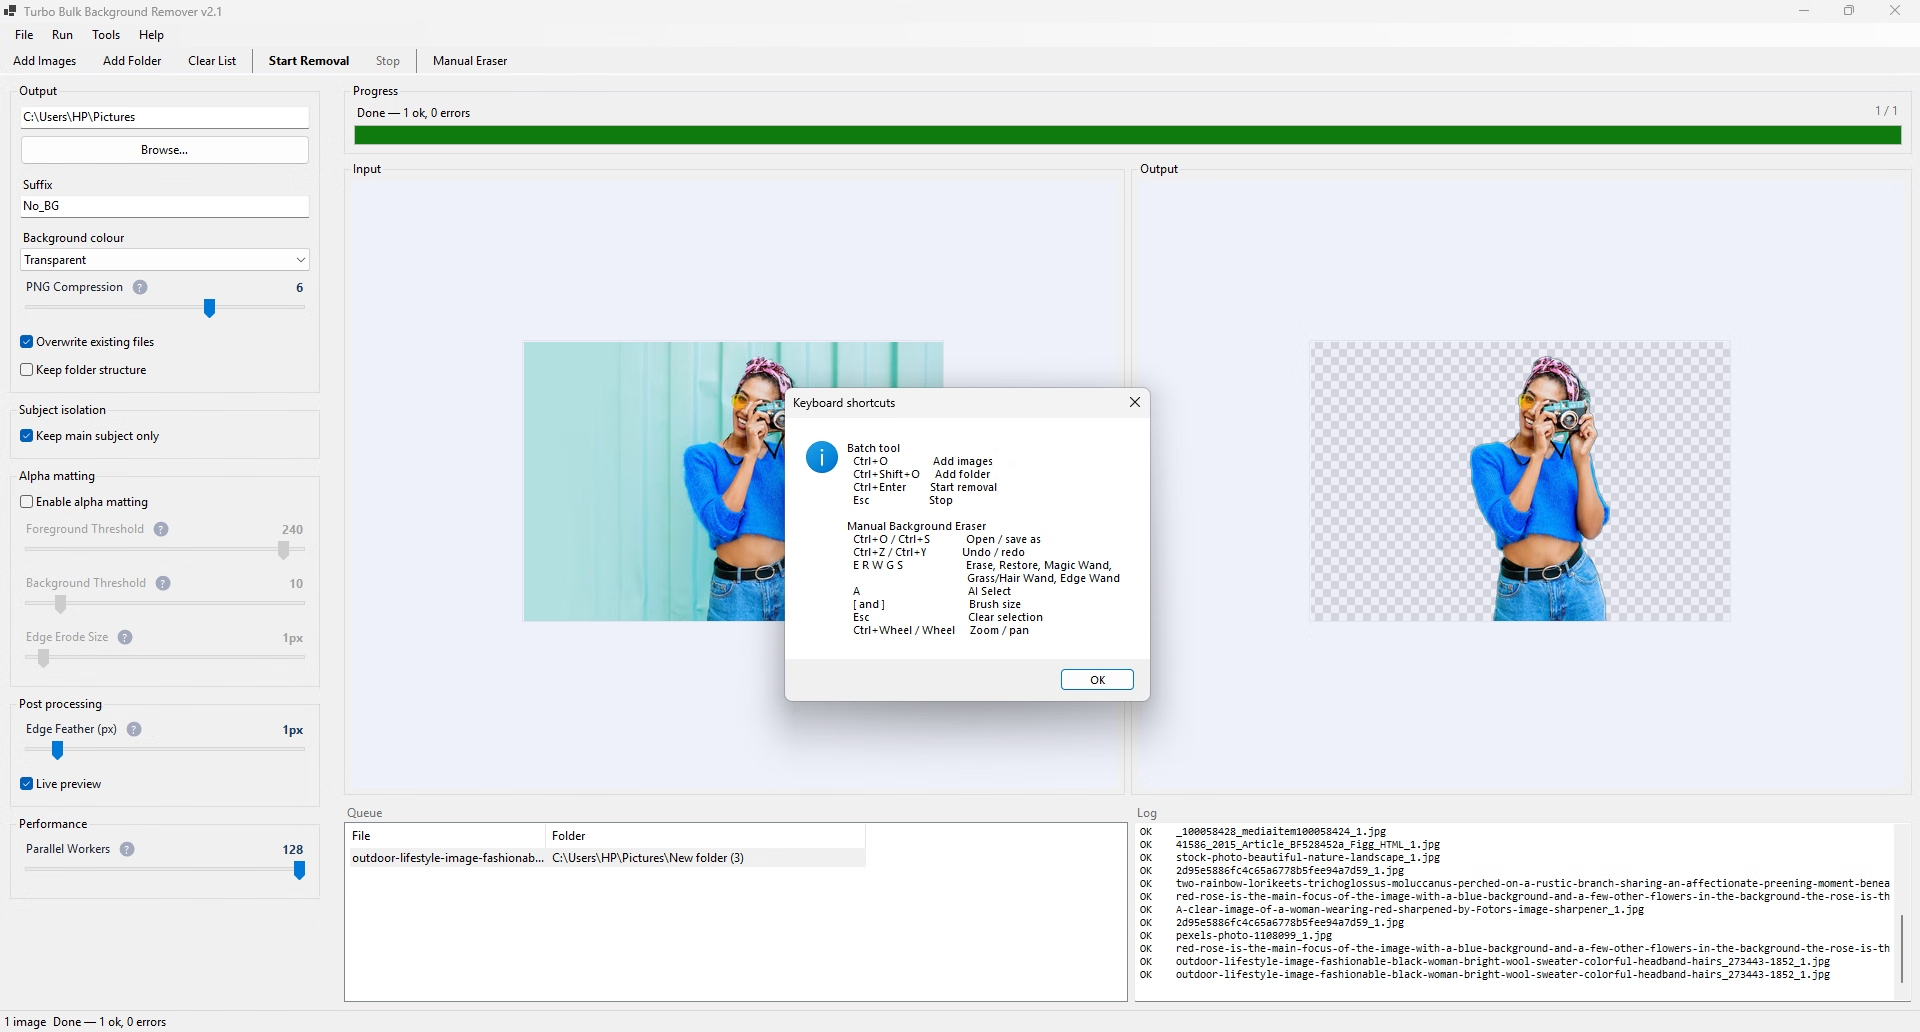
Ctrl+O, Ctrl+Shift+O, Ctrl+Enter and Esc drive the batch tool. In the eraser, E and R switch brushes, W, G and S pick wands, A runs AI Select, and the bracket keys resize the brush. Help ▸ Keyboard Shortcuts lists them all.
100% Offline — No Uploads
Not one image byte leaves your computer. No telemetry, no analytics, no remote scanning. The only outbound request the app ever makes is a licence check at launch, which carries no file names and no image data.
The settings column is grouped into Output, Subject isolation, Alpha matting, Post processing and Performance. Every control carries a tooltip in the app; here is the same reference in full, with the range and default of each one.
| Control | Range / Default | What it does |
|---|---|---|
| Output folder | — | Where finished PNG files are written. Also accepts a dropped folder. |
| Suffix | No_BG | Text appended to each output filename before the .png extension. |
| Background colour | Transparent | Transparent, White, Black, Green, Red or Blue composited behind the subject. |
| PNG Compression | 0–9, default 6 | 0 saves fastest and largest, 9 saves slowest and smallest. |
| Overwrite existing files | On | When off, files already in the output folder are skipped and logged. |
| Keep folder structure | Off | Recreates the source sub-folder layout inside the output folder. |
| Keep main subject only | On | Drops small disconnected leftover patches of background from the mask. |
| Enable alpha matting | Off | Refines edges for hair, fur and glass. Much slower; test on one image first. |
| Foreground Threshold | 1–255, default 240 | Mask pixels brighter than this count as definitely subject. |
| Background Threshold | 5–50, default 10 | Mask pixels darker than this count as definitely background. |
| Edge Erode Size | 0–20 px, default 1 | Shrinks the definitely-subject region before matting to trim fringe. |
| Edge Feather | 0–10 px, default 1 | Softens the final cut-out edge for natural-looking composites. |
| Live preview | On | Shows before/after thumbnails during the run. Off is marginally faster. |
| Parallel Workers | 1–128, default 128 | How many images are read, decoded and saved concurrently. |
The three alpha matting sliders are greyed out until the Enable alpha matting box is ticked, and every setting is snapshotted the instant you press Start Removal — so nudging a slider mid-run cannot change a batch that is already going. Your change applies to the next run instead.
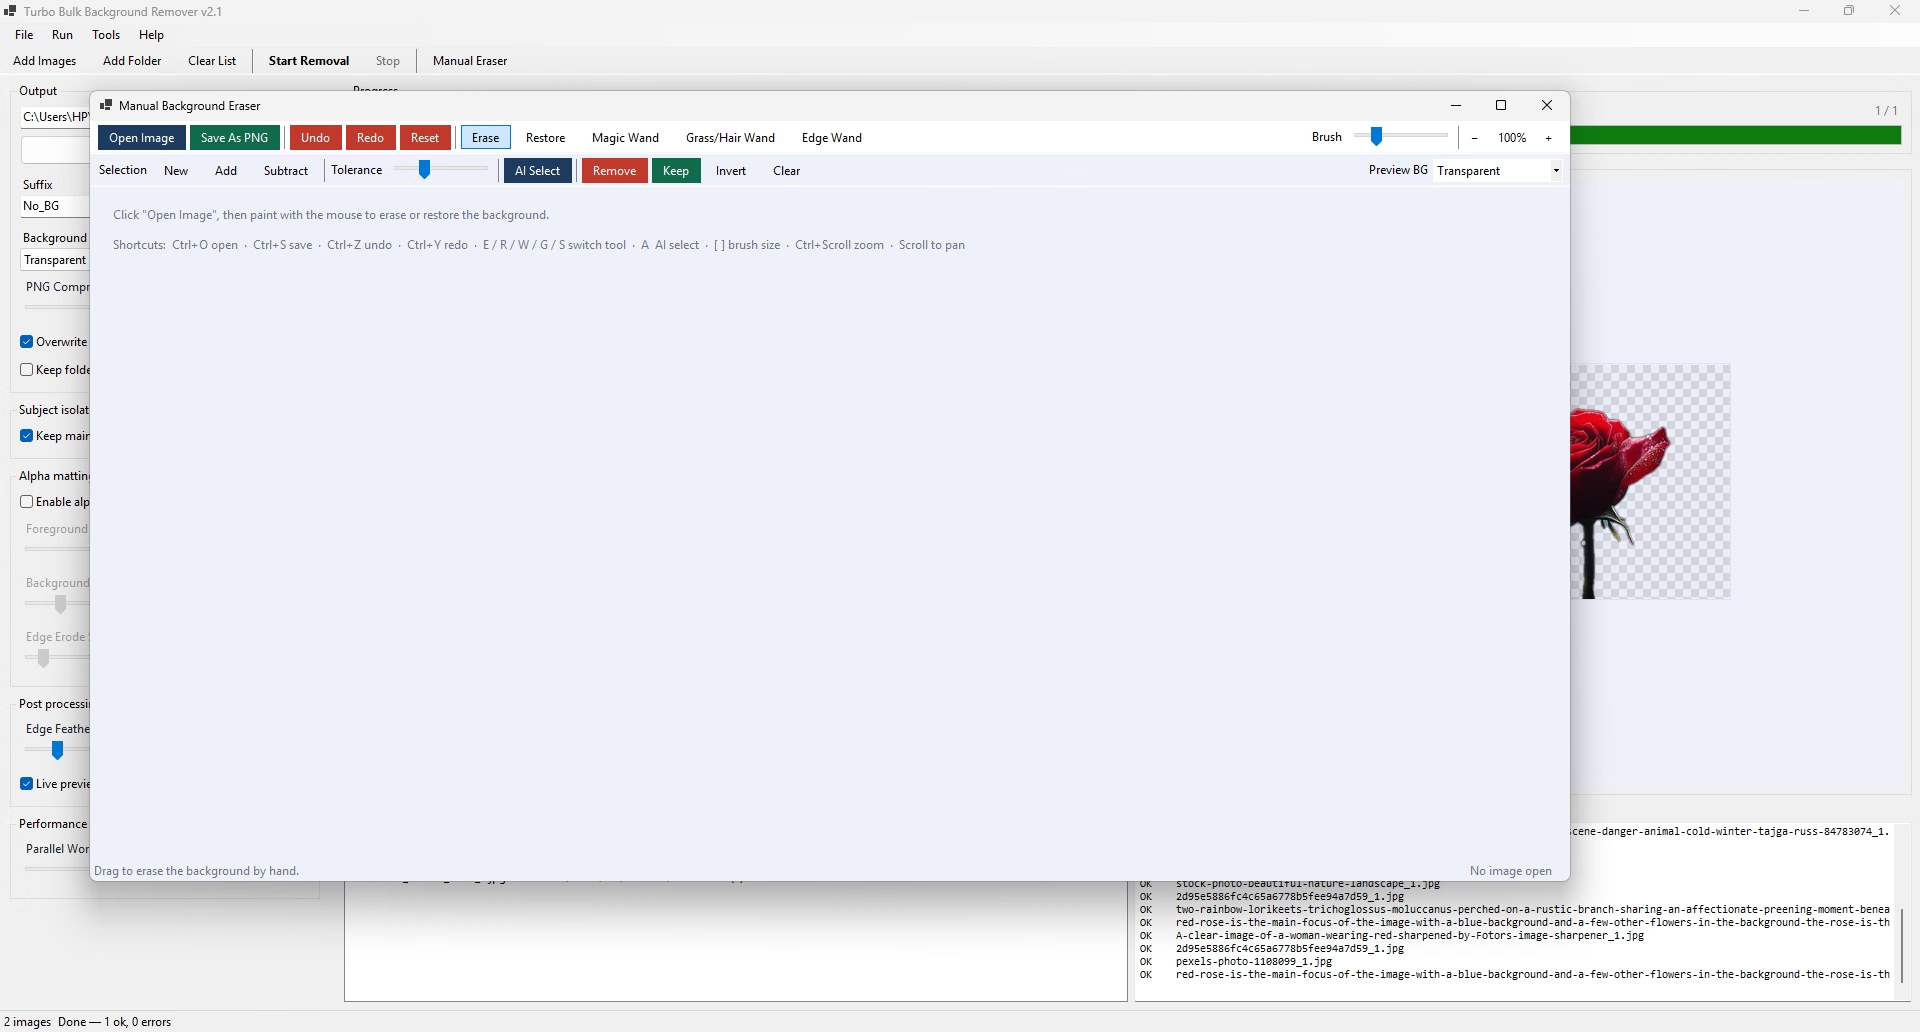
Some photographs defeat any automatic background remover: a subject the same colour as its backdrop, a reflective metal surface, a wire-frame chair, motion-blurred hair. Rather than leave you to re-shoot, the app opens any single image in a second window built for manual work. The canvas is checkerboarded so transparency is obvious at a glance, zoom runs on Ctrl+Wheel with a live percentage readout, and plain wheel and scroll bars pan around the image.
▶ AI Select (A)
Runs the same neural network the batch tool uses on the open image and selects the whole main subject in one click. Images that already carry transparency are composited onto white first, which is what the model expects — without that step a transparent PNG produces an unreliable mask.
Erase Brush (E)
Paint directly on the canvas to make pixels transparent. Brush diameter runs from 5 to 150 screen pixels, adjustable with the slider or the [ and ] keys, so you can clear large areas fast and then drop down for tight corners.
Restore Brush (R)
The exact inverse: paint erased pixels back to full opacity. This is what makes aggressive erasing safe — overshoot an edge, switch to Restore, and paint the subject back rather than undoing a whole stroke.
Magic Wand (W)
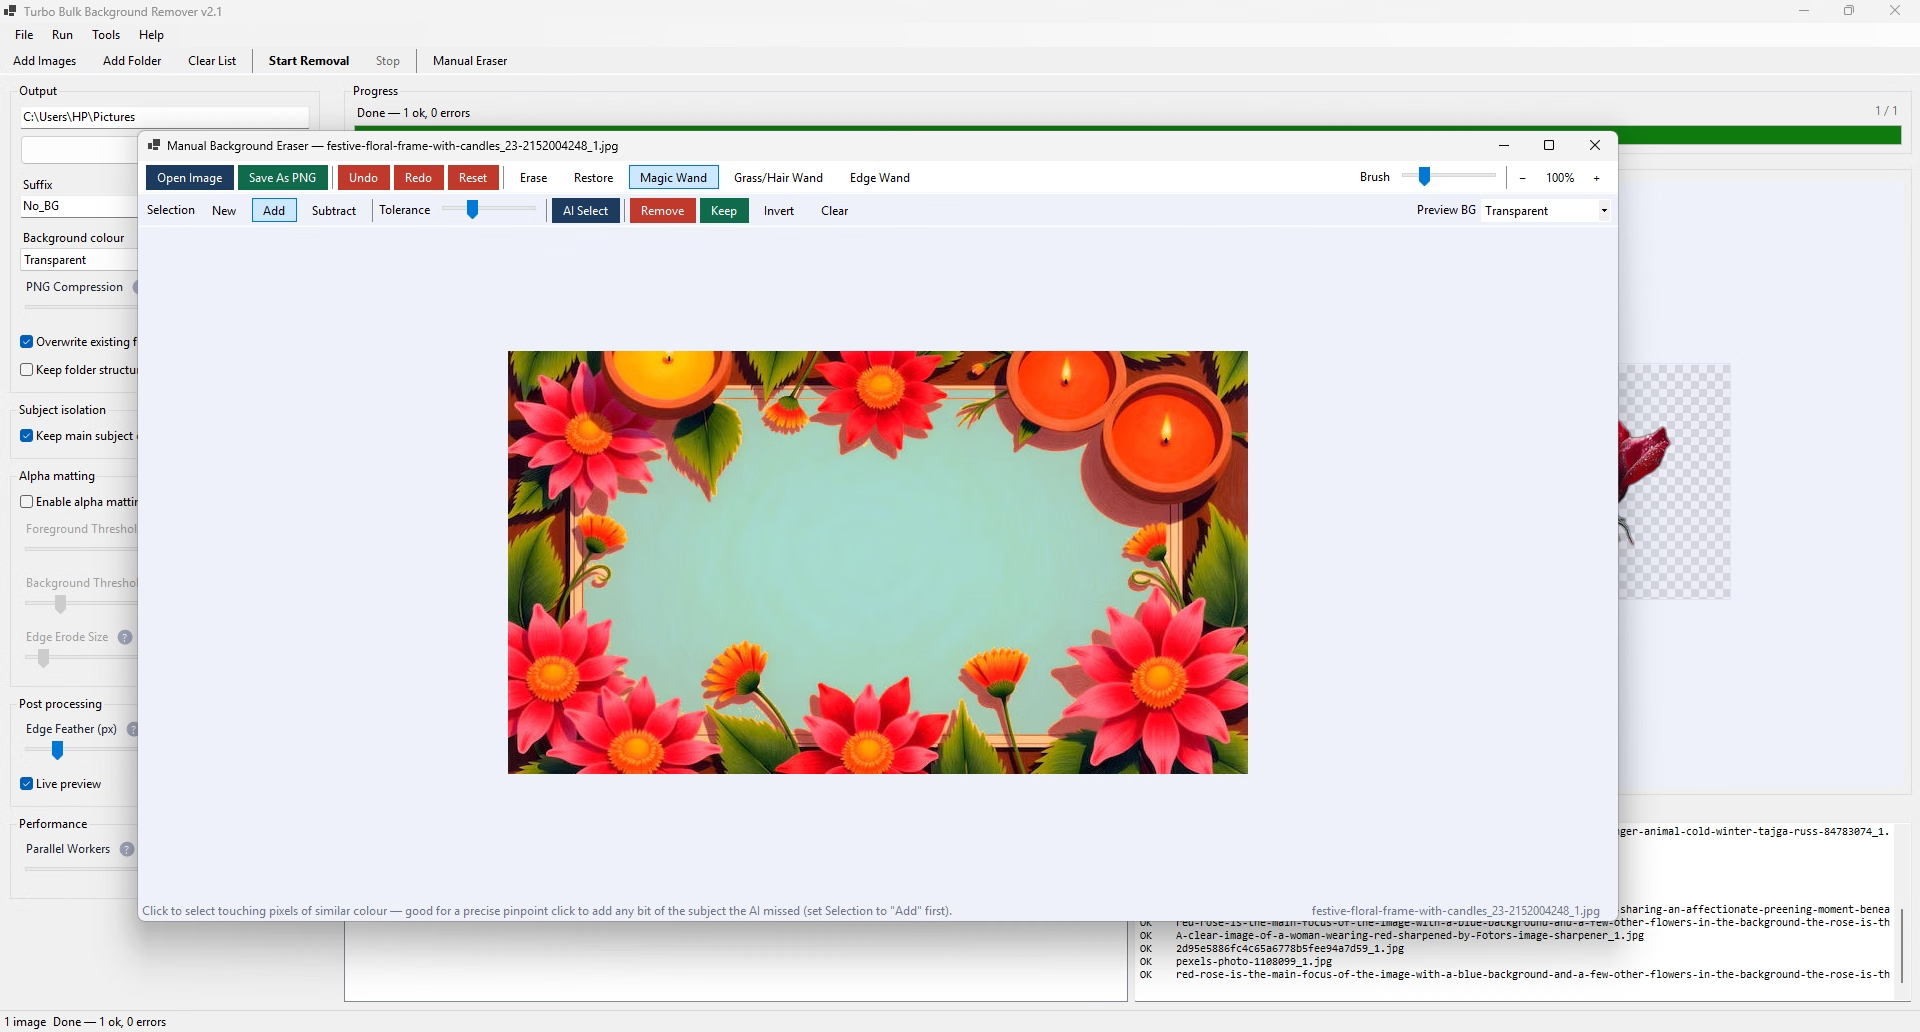
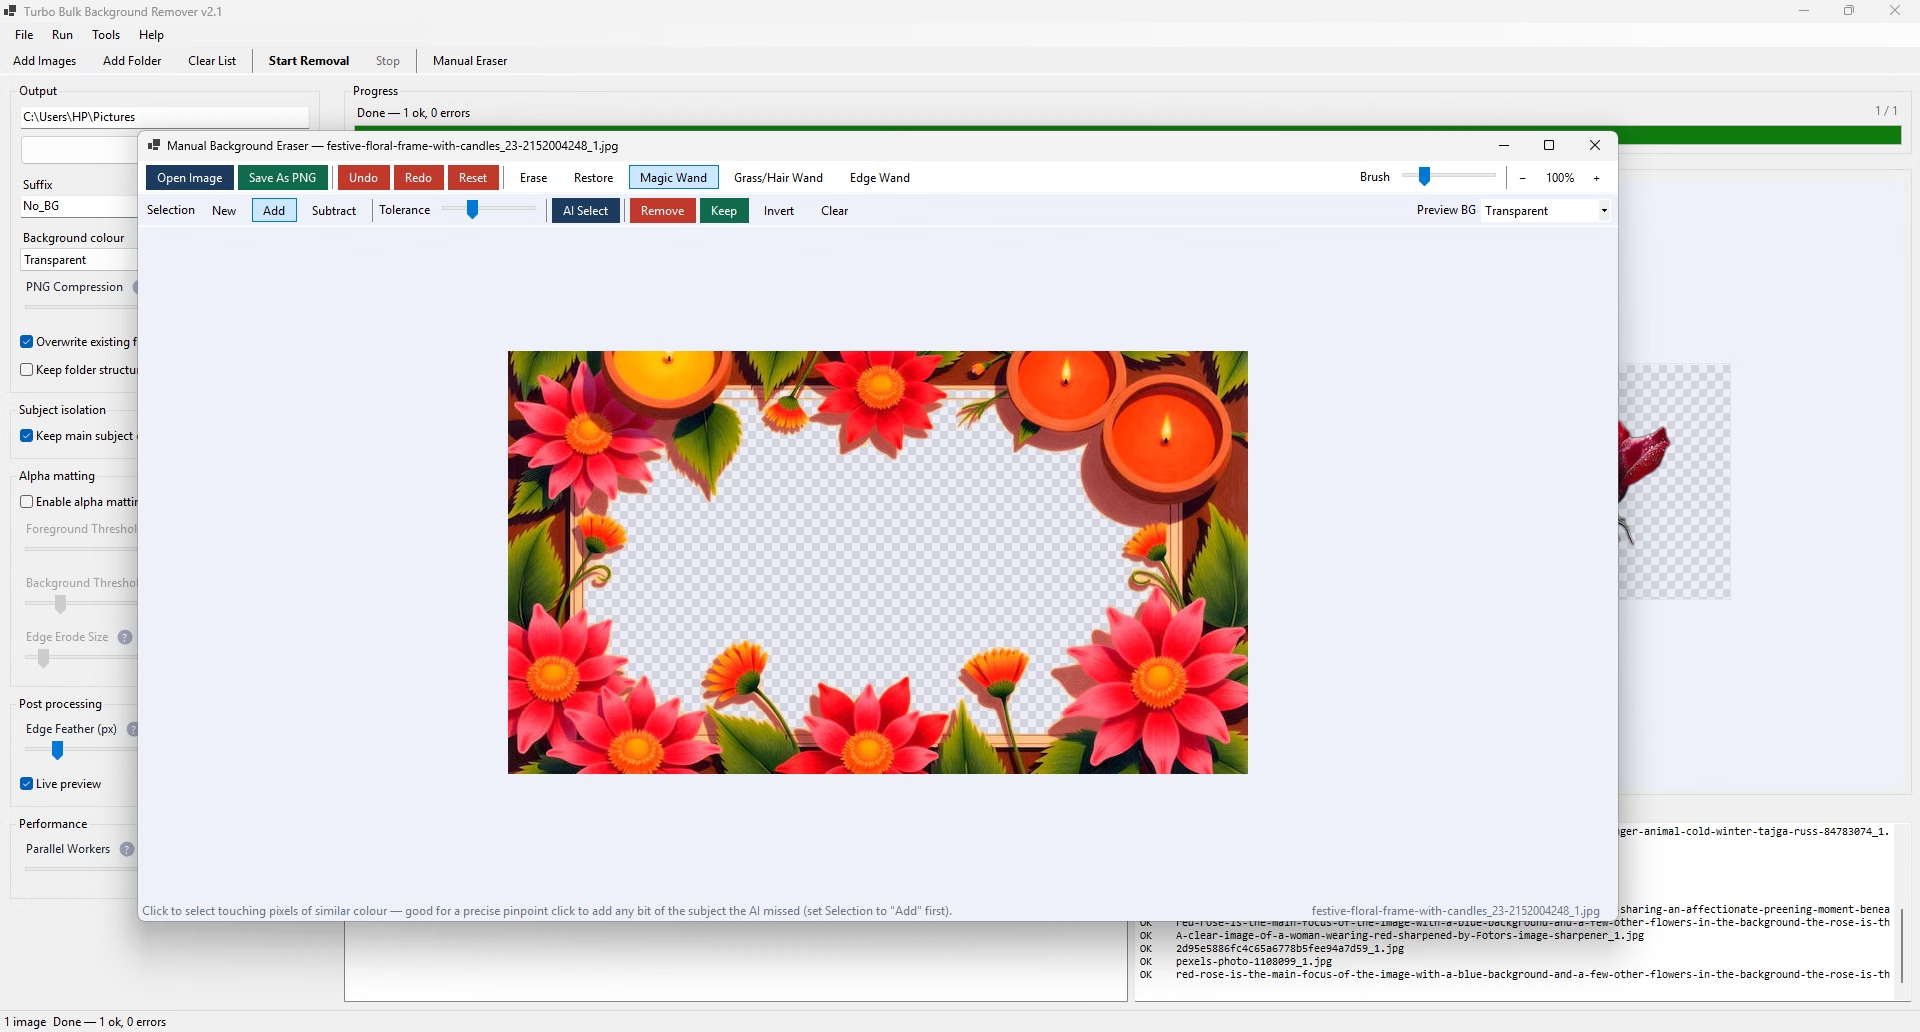
Click once to flood-fill a region by colour similarity, with a 0–100 Tolerance slider controlling how far the fill spreads before it stops at an edge. The right tool for flat, evenly lit backdrops — studio sweeps, scanned documents, screenshots.
Grass / Hair Wand (G)
Instead of flood-filling, it samples a patch around your click in hue, saturation and value space, works out that patch's statistical colour distribution, and selects every pixel within a tolerance-scaled distance of it. That is what lets it hold on to individual strands of hair, fur and grass that a flood fill either misses or over-selects.
Edge Wand (S)
Click near a rough boundary and it analyses gradient strength within a radius set by your current brush size, then selects the strongest edge band inside it — effectively snapping to the real edge of the cut-out so you can clean up a silhouette click by click instead of tracing it.
New / Add / Subtract Selection
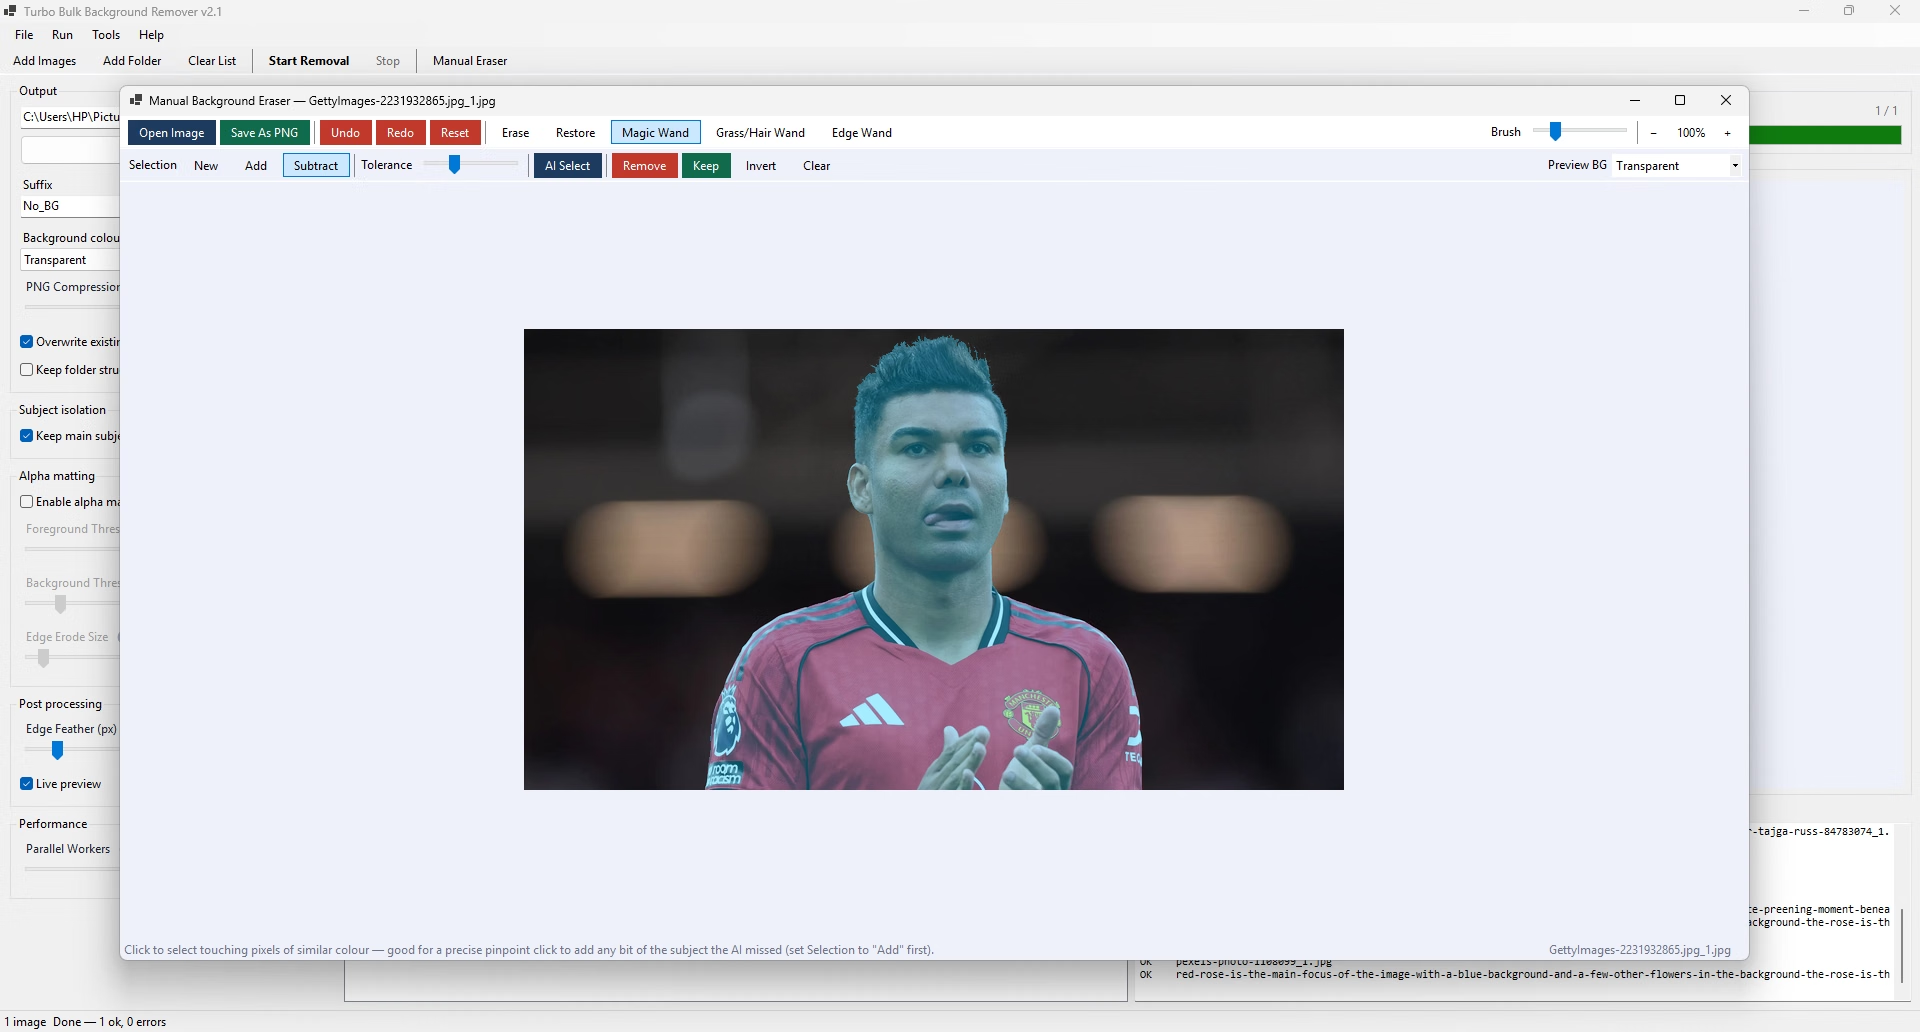
Wand clicks and AI Select build a pending selection rather than changing the image. The Selection control decides how each new click combines with what is already there: replace it, grow it, or cut away from it. Complex cut-outs get assembled from several clicks before anything is committed.
Remove / Keep / Invert / Clear
Commit the pending selection with Remove (erase what is selected) or Keep (erase everything else). Invert flips the selection — handy straight after AI Select, when the subject is selected but the background is what you want gone. Clear, or Esc, discards it entirely.
Undo, Redo and Reset
Fifteen levels of undo and redo cover every brush stroke and every wand or AI commit, and a one-click Reset returns the alpha channel to the original image. Nothing you do here can touch the source file on disk.
Preview Backgrounds
Swap the checkerboard for Transparent, White, Black or Gray to judge edge quality against a realistic backdrop. It is a display setting only — the saved PNG always carries the real alpha channel regardless of what you were previewing against.
Zoom and Pan
Ctrl+Wheel or the −/+ buttons zoom with a live percentage readout; plain wheel and the scroll bars move around the image. Edits are always applied at full source resolution no matter what zoom level you are working at.
Save as Transparent PNG
Ctrl+S writes the finished cut-out as a PNG with its alpha channel intact. Your original file is never modified — you always choose a destination, so the source stays exactly as it was.
1. Add your images
Press Add Images (Ctrl+O) to pick individual files, or Add Folder (Ctrl+Shift+O) to queue every supported image in a folder and all of its sub-folders. Dragging files or folders anywhere onto the window does the same thing. The queue shows file and folder columns and can be sorted by either.
2. Choose where the results go
Click Browse under Output and pick a destination folder, or drop one onto the path box. Set the Suffix if you want something other than No_BG. If you queued a folder tree and want it mirrored rather than flattened, tick Keep folder structure.
3. Pick your background
Leave Background colour on Transparent for a real alpha channel — the right choice for web, print and further compositing. Pick White for marketplace listings that require it, or Green if the cut-outs are headed for video editing.
4. Tune the edges only if you need to
The defaults handle most photos. Leave Keep main subject only on. Raise Edge Feather a pixel or two for softer composites. Turn on Alpha matting only when the subject has hair, fur or glass — and test it on one image first, because it is dramatically slower and can misbehave on reflective subjects.
5. Start the batch
Press Start Removal (Ctrl+Enter). The progress bar, current filename, done/total percentage and ok/errors tally all update as it goes, and the log records anything unusual with its reason. The window stays responsive throughout. Press Esc to stop after the images already in progress finish.
6. Refine anything that came out wrong
Open a problem image in the Manual Background Eraser, hit A for AI Select to get most of the way there, then clean up with the erase and restore brushes or the wand tools and save it as a transparent PNG. On a typical batch this is a handful of images out of hundreds.
Two-Stage Downscale Into the Model
The network takes a 1024×1024 input, so a 24-megapixel photograph has to be reduced substantially. Rather than one enormous Lanczos resize, the image is box-averaged by an integer factor first and then Lanczos-filtered the rest of the way. Averaging before a large reduction is proper area sampling, so this is both cheaper and visibly less aliased.
One Inference Per Image
With matting enabled the older approach predicted the mask, predicted it again for a quality check, then potentially again for the fallback. The mask is now predicted once and reused for all three purposes — close to a threefold saving in matting mode.
Serialised Inference, Parallel Everything Else
ONNX Runtime already fans a single inference across every core, so running several at once splits the same cores and multiplies peak memory rather than adding throughput. Inference is therefore capped at one at a time with thread count pinned to your core count, while file reading, decoding, feathering and saving run in parallel around it.
Trimap and Closed-Form Matting
When alpha matting is on, the mask is split by the two threshold sliders into definite foreground, definite background and an unknown band, and the solver runs on the unknown band alone. Solid regions are already decided, so including them would add millions of equations that resolve to the values they started with — restricting the solve is what makes it practical in-process at all.
Three Matting Safety Nets
Matting is skipped up front above 12 megapixels; retried without matting if an image runs out of memory; and compared against the model's own un-matted mask afterwards, falling back if the matted result kept less than half of it. That last one is the guard against a matting pass eating a reflective subject. All three write a note in the log.
Mask Upscale and Composite
The finished mask is scaled back to full source resolution with bilinear filtering, which on a smooth mask is indistinguishable from Lanczos while avoiding ringing at the edges. Compositing then uses Pillow's own rounded integer arithmetic rather than plain floating point, which differs by one on a large share of pixels and would otherwise show along soft edges.
Bounded Memory, Responsive Window
Worker threads run at below-normal priority and park instead of allocating once the in-flight memory budget is reached. Nothing on a worker thread touches the interface: the batch publishes counters and queues, and the window polls them roughly seven times a second. That is why a long run does not freeze the window.
Per-Image Watchdog
Each image gets 120 seconds of actual processing time, measured from when a worker picks it up rather than from when it joined the queue. Exceed it and the file is logged as failed and the batch moves on, so one pathological image can never stall a queue of thousands.
E-commerce and Marketplace Listings
Amazon, eBay, Etsy, Shopify and most marketplaces expect products on pure white or on transparency. Queue an entire product shoot, choose White or Transparent, and get consistently cut-out listings without touching each photo. The suffix keeps originals and outputs clearly distinguishable.
Product Photography Studios
A day's shooting is hundreds of frames. Running them through a local image background remover overnight avoids both the per-image cost of an online service and the hours of upload time that a few gigabytes of raw-converted TIFFs would otherwise take.
Portrait and Headshot Work
Corporate headshot sessions need consistent backgrounds across dozens of subjects. Alpha matting handles the hair, and the manual eraser is there for the one or two frames where a flyaway strand crosses a similarly coloured backdrop.
Graphic Design and Compositing
Cut-outs with a real alpha channel and a one-pixel feather drop into layouts cleanly. Transparent PNG is the working format, so results go straight into Photoshop, Affinity, Figma, Canva or InDesign without a conversion step.
Print and Signage
Because processing happens at full source resolution rather than a service's capped output size, a cut-out taken from a 45-megapixel file is still a 45-megapixel cut-out — which matters when it is going on a banner rather than a web page.
Sensitive and Confidential Images
Medical photography, legal exhibits, identity documents, unreleased product designs and client work under NDA cannot be uploaded to a third-party background remover at all. Running locally removes the question entirely.
Catalogue and Data Migration
Moving a catalogue between platforms often means reprocessing every image. Keep folder structure mirrors an existing SKU hierarchy into the output folder, so the result drops back into the same layout the importer expects.
Content Creation and Video
Thumbnails, overlays and lower thirds all need clean cut-outs. The Green background option produces standard chroma-key output for editors that prefer keying to alpha, while Transparent works directly in anything that reads PNG alpha.
A free background remover in the browser is genuinely convenient for one or two images, and if that is all you need, use one. The differences start to matter at volume, at full resolution, and when the photographs are not yours to upload. Here is an honest comparison rather than a sales pitch — there are real trade-offs in both directions.
| Turbo Bulk Background Remover | Typical online background remover | |
|---|---|---|
| Where images go | Nowhere — read and written on your own disk | Uploaded to a third-party server |
| Internet needed | Only for the licence check at launch | Required for every image |
| Volume | Unlimited, whole folders unattended | Usually capped per day or per plan |
| Output resolution | Full source resolution, always | Often reduced on free tiers |
| Cost model | One-time licence, no per-image fee | Per image, per credit or monthly |
| Watermarks | Never | Common on free output |
| Manual correction | Built-in eraser with brushes and three wands | Limited or unavailable |
| Time cost | Disk read speed | Upload and download time per image |
| Platform | Windows 10 and 11, 64-bit only | Any device with a browser |
| Price to start | Paid, one-time | Free tier available |
The two rows at the bottom are the honest trade-off: a browser tool runs anywhere and costs nothing to try, and this does not. What you get in exchange is unlimited volume at full resolution with nothing leaving your machine.
- Originals Are Never Modified — source files are only ever read. Output goes to a separate folder with a suffix on every filename.
- Overwrite Protection — with Overwrite off, existing output files are skipped and each skip is named in the log rather than counted as a silent success.
- Per-Image Watchdog — 120 seconds of real processing time per image, measured from when work actually starts, so one bad file cannot stall the queue.
- Out-of-Memory Retry — an image that exhausts memory during matting is retried without it instead of failing outright.
- Automatic Matting Fallback — if matting keeps less than half of what the plain mask kept, the plain result is used instead. This is the guard against a reflective subject being eaten.
- Resolution Cap — matting is skipped above 12 megapixels rather than attempting a solve that would need gigabytes.
- Settings Snapshot — every setting is frozen the moment you press Start, so a slider nudged mid-run cannot corrupt a batch in progress.
- Bounded Memory — an in-flight governor caps decoded pixels at about a third of available RAM, so even 128 workers on 24-megapixel photos cannot exhaust the machine.
- Cross-Drive Handling — if Keep folder structure cannot apply because source and output are on different drives, the file is saved flat and the log explains why, rather than failing.
- 15-Step Undo in the Eraser — every stroke and commit is reversible, with a one-click Reset back to the original.
- Safe Close — closing mid-batch asks for confirmation and cancels workers cleanly rather than leaving threads running.
Batch tool
| Shortcut | Action |
|---|---|
| Ctrl+O | Add images to the queue |
| Ctrl+Shift+O | Add a folder, including sub-folders |
| Ctrl+Enter | Start removal |
| Esc | Stop after images already in progress |
| Drag & Drop | Drop files or folders anywhere on the window to queue them |
| Right-click queue | Remove selected · Clear list · Open containing folder |
Manual background eraser
| Shortcut | Action |
|---|---|
| Ctrl+O | Open an image |
| Ctrl+S | Save as transparent PNG |
| Ctrl+Z / Ctrl+Y | Undo / Redo (15 steps each) |
| E / R | Erase brush / Restore brush |
| W | Magic Wand |
| G | Grass / Hair Wand |
| S | Edge Wand |
| A | AI Select — one-click subject cut-out |
| [ / ] | Shrink / grow the brush |
| Esc | Clear the pending selection |
| Ctrl+Wheel | Zoom in and out |
| Wheel | Pan the canvas |
GPU Execution Is the Big One
Moving the model step onto a GPU through DirectML or CUDA is typically a five to fifteen times speed-up, and the model step dominates a batch. It is detected automatically; About reports whether you are getting it.
Model Loaded Once, Shared by All
One session is created for the whole run and reused by every worker, so the several-second first-load cost is paid once rather than per image, and memory holds one copy of the weights instead of one per thread.
I/O Hidden Behind Inference
While one image is in the model, others are being read, decoded, feathered and written. On a large queue of small files this overlap is most of the throughput gain, which is why the worker slider goes as high as it does.
Alpha Matting Is the Main Cost
It solves a large linear system per image and legitimately takes seconds to tens of seconds per file, against sub-second otherwise. If a run feels slow, this is the first thing to check — it is the algorithm, not a bug.
PNG Compression Is the Second
Level 9 spends noticeably longer per file than level 6 for a modest size saving. On a large batch that difference compounds; drop it if throughput matters more than disk space.
The Window Stays Responsive
Counters are polled on a timer rather than pushed per image, the log is appended in blocks instead of being re-split on every line, and workers run below normal priority. Long runs keep repainting normally.
| Direction | Formats |
|---|---|
| Input | PNG, JPG, JPEG, WEBP, BMP, TIFF, TIF — mixed freely in one queue |
| Batch output | PNG, with a real alpha channel or a solid background composited in |
| Manual eraser output | PNG with alpha |
Output is PNG throughout because it is the only widely supported format that carries genuine per-pixel transparency. If you need the finished cut-outs as JPG, WEBP, AVIF or anything else afterwards, run the output folder through Turbo Batch Image Converter Pro, which handles the conversion in bulk with the same offline approach.
Every stage of processing — decoding, the neural network, alpha matting, feathering, compositing and encoding — happens inside the application on your own hardware. There is no upload step, because there is nothing to upload to. For a great many people this is not a preference but a requirement: client work under NDA, medical and legal photography, identity documents, and unreleased product designs simply cannot be sent to a third-party service.
- No image data is transmitted, logged, analysed, cached or stored anywhere outside your machine
- No telemetry, no usage analytics, no advertising trackers and no third-party SDKs
- The only outbound request is licence verification at launch — it carries no file names, no image content and no personal data beyond the licence itself
- The AI model is downloaded once and then used from disk indefinitely; it can also be placed manually for fully air-gapped installs
- Source files are opened read-only, so nothing in your originals folder can be altered
- Suitable for confidential, regulated and commercially sensitive image workflows
| Operating System | Windows 10 (64-bit) |
| Processor | 2 CPU cores |
| Memory | 4 GB RAM |
| Storage | 800 MB free disk space, including the AI model |
| Graphics | None required — runs on CPU |
| Network | Needed for activation and the one-time model download |
| Operating System | Windows 11 (64-bit) |
| Processor | 4 or more CPU cores |
| Memory | 8 GB RAM or more — 16 GB for very large batches |
| Graphics | Any DirectML-capable GPU (AMD, Intel or NVIDIA), or an NVIDIA card for CUDA |
| Storage Type | SSD, which materially helps on large queues |
| Free Disk Space | 1.5 GB or more |
| App Name | Turbo Bulk Background Remover |
| Version | 2.1 |
| Platform | Windows 10 and 11, 64-bit |
| Category | Utilities — Image Editing |
| AI Model | isnet-general-use, run locally at 1024×1024 |
| Compute | CPU, or DirectML / CUDA GPU when available |
| Output Format | PNG with alpha |
| Licence Management | Gumroad — one-time purchase, activation per PC, releasable from Help ▸ License |
Why a desktop image background remover still beats the browser
Turbo Bulk Background Remover is a Windows application that exists to solve a specific problem: you have more images than you want to handle one at a time, and you would rather not upload them. As an AI background remover it uses a real segmentation network rather than a colour-key trick, so it can remove background from image files with genuinely complicated subjects — a bicycle, a potted plant, a person with loose hair — not just products on a clean white sweep. As a bulk image background remover it will work through a folder tree of any size unattended, writing each result as a transparent PNG next to a log of anything that needed a decision.
The word people usually search for is background remover, and most of what that search returns are web services. They are good at what they do. The difficulty is that they were designed around a single image at a time: every photo has to travel up to a server and back down again, free tiers cap the resolution you get back, and the pricing is per image or per month rather than once. If you process fifty photos a year, none of that matters. If you process fifty photos a day, all of it does. A local photo background remover reads from your disk at disk speed, never reduces your resolution, and costs the same on the ten-thousandth image as on the first.
Where a background eraser beats pure automation
No ai photo background remover gets every image right, and any tool that claims otherwise has not been tested on enough awkward photographs. Chrome-plated surfaces reflect their surroundings, so the model sees background where there is subject. Glass is partly background by definition. A dark jacket against a dark studio wall gives the network almost nothing to separate. This is why the application ships with a manual background eraser rather than leaving you stuck: open the problem image, press A for a one-click AI selection to get most of the way there, then fix the remainder with an erase or restore brush, a magic wand on the flat areas, a grass and hair wand for wispy detail, or an edge wand to snap the silhouette back to where it belongs. Fifteen levels of undo mean experimenting costs nothing.
The selection model deserves a mention because it is what makes complex cut-outs practical. Wand clicks and AI selections do not change the image immediately; they build a pending selection that you grow with Add, trim with Subtract, flip with Invert, and only then commit with Remove or Keep. A cut-out that would be tedious as a single perfect click becomes four or five rough ones that together produce exactly the right shape.
On the phrase “free background remover”
It is worth being straightforward about this, because a great many people searching for a free background remover will land on pages like this one. Turbo Bulk Background Remover is not free. It is a paid application with a one-time licence and no subscription. If you need to remove background from a handful of images occasionally, a free web tool is genuinely the sensible choice and you should use one. What a paid desktop tool buys you is the removal of the limits that make free tiers frustrating at volume: no daily cap, no downscaled output, no watermark, no per-image credit, no upload, and no queue behind other users. It also buys permanence — a licensed copy on your disk keeps working regardless of what happens to any particular website's pricing or terms. Put another way: this is not a free tool, but it is a background remover free of subscriptions, credits, upload limits, watermarks and daily quotas, which for high-volume work is usually the thing that actually matters.
Fitting it into an existing workflow
Because output is always transparent PNG, results drop straight into Photoshop, Affinity Photo, GIMP, Figma, Canva, InDesign, Premiere or any e-commerce importer without a conversion step. If you need a different format afterwards, Turbo Batch Image Converter Pro converts the finished folder in bulk, and Turbo Bulk Renaming Tool will rename the results into whatever naming scheme your catalogue expects. All three run offline, which means an entire image pipeline — remove background, convert, rename — can run on a machine that has never been connected to the internet beyond activating its licences.
Is Turbo Bulk Background Remover a free background remover?
No. It is a paid Windows application with a one-time licence fee and no subscription, no per-image credits and no monthly quota. Most tools marketed as a free background remover are web services that cap resolution, watermark the result, limit you to a handful of images a day, or require you to upload your photos to somebody else's server before they will remove background pixels at all. Turbo Bulk Background Remover takes the opposite approach: you pay once, install it on your PC, and then remove background from image files in unlimited quantity, at full resolution, entirely offline. So while it is not free, it is a background remover free of quotas, credits, watermarks and uploads.
Does this AI background remover work offline?
Yes, once the AI model is installed. Every stage of processing — decoding, the neural network itself, alpha matting, feathering and saving — runs on your own CPU or GPU. No image is ever uploaded. The only network request the app makes is a licence check against Gumroad when it launches, and that request contains no file names and no image data.
How do I remove background from image files in bulk?
Add images with Add Images (Ctrl+O) or point the app at a whole folder with Add Folder (Ctrl+Shift+O), which walks every sub-folder for supported files. Choose an output folder, pick your background colour and settings, then press Start Removal (Ctrl+Enter). The batch runs unattended with a live progress bar, a done/total readout, an ok/errors tally and a scrolling log, and you can stop it at any point with Esc.
How many images can this image background remover process at once?
There is no built-in limit on queue length. The queue is a list of file paths rather than decoded images, so adding tens of thousands of files costs almost nothing in memory. What is bounded is how many images are decoded at the same time: an in-flight memory governor caps that at roughly a third of your available RAM, clamped between 512 MB and 4 GB, so a folder of 24-megapixel photos cannot exhaust memory no matter how high you set Parallel Workers.
Which image formats can I open?
PNG, JPG, JPEG, WEBP, BMP, TIFF and TIF. Mixed-format folders are fine — you can queue JPEGs, WebP files and TIFFs together in one batch.
What format does the background remover save in?
Every batch output is written as PNG, because PNG is the only widely supported format that carries a real alpha channel. The Manual Background Eraser also saves as PNG. If you need the finished cut-outs as JPG, WEBP or another format afterwards, run them through Turbo Batch Image Converter Pro.
Can I put a solid colour behind the subject instead of transparency?
Yes. The Background colour dropdown offers Transparent, White, Black, Green, Red and Blue. Transparent keeps a real alpha channel. The Green option uses a standard chroma-key green, which is useful if the cut-outs are headed for video editing software.
What is alpha matting and should I turn it on?
Alpha matting refines the boundary between subject and background by solving for partial transparency along the edge, which is what makes hair, fur, fine fabric and glass look natural rather than cut out with scissors. It is off by default for two reasons. It is by far the slowest setting in the app — seconds to tens of seconds per image rather than the usual sub-second — and on reflective or highly textured subjects such as metal cans it can occasionally erase large parts of the subject instead of just refining its edge. Test it on one representative image before trusting it across a whole folder.
What do the Foreground Threshold, Background Threshold and Edge Erode sliders do?
They build the trimap that alpha matting works from. Foreground Threshold (1–255, default 240) sets how bright a mask pixel must be to count as definitely subject. Background Threshold (5–50, default 10) sets how dark it must be to count as definitely background — push this near zero and almost nothing qualifies, leaving the matting solver with no anchor and producing patchy results. Edge Erode Size (0–20 px, default 1) shrinks the definitely-subject region before matting, which trims stray background fringe, but set too high on a complex subject it can shrink that region to almost nothing.
Why did alpha matting get skipped on some of my images?
There are three safety nets, and all three write a note in the log. Images above 12 megapixels skip matting up front, because the linear system it solves scales with pixel count and a 21-megapixel photo alone needs gigabytes for a single intermediate array. If a smaller image still runs out of memory, it is retried without matting. And if the matted result keeps less than half of what the model's own un-matted mask kept, the un-matted version is used instead — that is the guard against matting eating a reflective subject.
What does Keep main subject only do?
It cleans up the mask so only the main connected subject survives, discarding small disconnected patches of background the model left behind. It is on by default and is usually what you want for product photography and portraits. Turn it off when a photo legitimately contains several separate subjects you want to keep.
What is Edge Feather for?
It applies a slight blur to the cut-out edge, 0 to 10 pixels, so the subject blends into whatever you composite it onto instead of showing a hard, aliased boundary. The default of 1 px is a good general setting. Use 0 if you need the mask completely crisp.
Does the background remover use my GPU?
It will, if a GPU-capable ONNX Runtime build is present. DirectML is supported, which covers essentially any modern Windows GPU — AMD, Intel or NVIDIA — and CUDA is supported on NVIDIA hardware. The app probes for a working provider at startup and silently falls back to CPU if none is usable, so it always runs. Help ▸ About tells you which one is live. GPU execution is typically 5–15× faster on the model step, which is the dominant cost in a batch.
What does the Parallel Workers slider actually control?
It controls how many images are being read, decoded, feathered and saved at the same time — not how many run through the AI at once. Model inference is deliberately serialised, because ONNX Runtime already spreads a single inference across every core; running several at once just splits the same cores between them and multiplies peak memory. So raising Workers hides file I/O behind inference, which is a real gain, but past roughly your core count the extra workers mostly queue. The default is 128 and it is safe to leave there because the memory governor bounds what those workers can hold.
Is a high worker count going to crash my PC?
No. Workers past the in-flight memory budget park and wait instead of allocating. Worker threads also run at below-normal priority so they cannot starve the interface thread, and the window polls counters on a timer rather than being pushed one update per finished image — which is why the window keeps repainting normally throughout a long run.
Why is my batch slow?
Check three things, in this order. First, whether alpha matting is on — it is by a wide margin the biggest per-image cost. Second, whether PNG Compression is at 9, which is the slowest save setting. Third, whether Help ▸ About reports CPU rather than DirectML or CUDA.
What is the AI model and where does it come from?
The app uses isnet-general-use, the same general-purpose segmentation model rembg uses, run at 1024×1024. It is around 170 MB. On first launch the app looks for it in an existing rembg or u2net folder, in its own application data folder, and in a Models folder next to the executable. If it is not found, the first Start Removal or AI Select offers a one-time download with a progress bar and a Cancel button. After that it is reused from disk and never downloaded again.
Can I install the model manually on a machine with no internet?
Yes. Copy isnet-general-use.onnx into %LOCALAPPDATA%\Turbo Bulk Background Remover\models\ or into the Models folder next to the executable, and the app will find it at startup. Tools ▸ Install / verify AI model confirms it is in place.
What is the Manual Background Eraser?
A second window, opened from the Manual tool button or Tools menu, for the images where a fully automatic result is not quite right. It gives you a paint-style background eraser — Erase and Restore brushes, three different wand tools, one-click AI Select and a pending-selection workflow — on a single image, with a checkerboard canvas so you can see exactly what is transparent.
What is the difference between the three wands?
Magic Wand (W) flood-fills from your click by colour similarity, controlled by the Tolerance slider — the right tool for flat, even backgrounds. Grass/Hair Wand (G) instead samples a patch around your click in hue/saturation/value space and selects pixels whose colour falls within a tolerance-scaled statistical distance of that distribution, which is what lets it hold on to thin strands of hair, fur and grass that a flood fill would miss or over-select. Edge Wand (S) analyses gradient strength within a radius set by your brush size and selects the strongest edge band, so you can snap to the true boundary of a cut-out and tidy it click by click.
How does the selection workflow work in the background eraser?
Wand clicks and AI Select build a pending selection rather than changing the image straight away. The Selection control decides how a new click combines with what is already selected: New replaces it, Add grows it, Subtract removes from it. Once the selection looks right, Remove erases it, Keep erases everything outside it, Invert flips it and Clear (or Esc) discards it. Nothing is committed to the image until you press Remove or Keep.
Can I undo mistakes while erasing a background?
Yes. The Manual Background Eraser keeps 15 undo steps and 15 redo steps, covering every brush stroke and every wand or AI commit, plus a one-click Reset back to the original image. The batch tool never modifies your originals at all.
Does the preview background change what gets saved?
No. The Preview BG control in the manual eraser — Transparent, White, Black or Gray — only swaps what is drawn behind your cut-out on screen so you can judge edge quality against a realistic backdrop. The saved PNG always carries the real alpha channel.
Does AI Select work on an image that is already transparent?
Yes. Images with existing transparency are composited onto white before being handed to the model, which is what the model expects. Without that step a transparent PNG produces an unreliable mask.
Will it overwrite my original photos?
No. Originals are only ever read. Output is written to the folder you choose, with a suffix appended to each file name — No_BG by default, so photo.jpg becomes photoNo_BG.png. The Overwrite existing files checkbox governs only files already sitting in the output folder, and with it off, skipped files are named in the log rather than silently counted as successes.
Can it recreate my folder structure in the output?
Yes — tick Keep folder structure and the sub-folder layout under the folder you added is recreated inside your output folder. If the source and output happen to be on different drives, the file is saved flat instead of failing, and the log says why.
What happens if one image is corrupt or hangs?
A per-image watchdog gives each image 120 seconds of actual processing time, measured from when a worker picks it up rather than from when it was queued. If it exceeds that it is logged as failed and the batch moves on. One bad file can never stall the queue.
Can I change settings while a batch is running?
You can move the controls, but it will not affect the run in progress. Settings are snapshotted the moment you press Start Removal, so a batch always finishes with the settings it began with. Your changes apply to the next run.
Does it keep the same output as the older Python version?
Yes, deliberately. The compositing arithmetic reproduces Pillow's own rounded integer operations rather than plain floating-point maths, which differs by one on a large share of pixels and would show along soft edges. The premultiplication behaviour of rembg's non-matting cut-out is reproduced as well. Existing activations carry over too, so there is nothing to re-activate.
Is this a photo background remover for portraits or a product-photo tool?
Both. isnet-general-use is a general-purpose segmentation model rather than a person-specific one, so it handles people, products, furniture, food, vehicles, pets and artwork. Portraits benefit most from alpha matting for hair; flat-lay product shots usually need nothing beyond the defaults.
Can I use the results commercially?
Yes. The output is your own image data and TurboSoft claims no rights over anything you produce. The app is licensed per user for commercial and personal work alike.
What are the system requirements?
64-bit Windows 10 or 11, two CPU cores and 4 GB of RAM as an absolute minimum, plus roughly 800 MB of free disk space including the AI model. For comfortable work on large batches, four or more cores, 8 GB or more of RAM, an SSD and a DirectML-capable GPU make a substantial difference.
How is the licence managed?
Through Gumroad. You activate once with the email address and licence key from your purchase; the key is then cached locally in your application data folder and verified at each launch. Help ▸ License shows who the copy is licensed to and can release the licence from that PC so you can move it to another machine.
Does it need an internet connection to start?
By default yes, for the licence check at launch, even on an already-activated PC. The AI processing itself needs no connection at all once the model is on disk.
Does it collect any data about me or my images?
No. There is no telemetry, no analytics, no remote scanning and no third-party integration of any kind. File names, image content and processing statistics never leave your machine. The only outbound request is the licence verification call, which carries no personal data or file information.
How does this compare with an online AI background remover?
The practical differences are upload time, privacy, volume and cost. A browser-based image background remover has to receive every file before it can start, which dominates the total time on large batches and means your photos sit on a third-party server. It will usually cap output resolution on the free tier and charge per image or per month beyond it. A desktop background remover reads straight from your disk, keeps everything local, works at full resolution and has no per-image cost. The trade is that you install software and it only runs on Windows.
Can I try it before buying?
There is no built-in trial build. Gumroad's refund policy applies to the purchase, and the support page is the right place to ask anything specific about whether it fits your workflow before you buy.
Leave a Review
Community Reviews